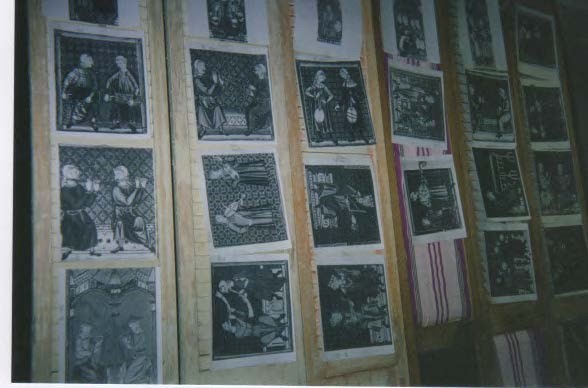
About 25 years ago, I started a fiber art piece in the form of a Medieval Screen which displays embroidered laid work patches from two 13th century manuscripts. This manuscripts depicts Christian, Jewish, and Muslim musicians and instruments from the courts of Castile and Leon. This manuscripts are: Las Cantigas de Santa Maria which translates, as I understand it, to mean: Songs for the Virgin Mother Mary and The Book of Games. All photos submitted in this narrative are provided by myself.
I started scanning images from this manuscript from books and web sites and printed them out on regular paper, dreaming of a way to enlarge them and embroider them on fabric. After months of research, I learned about images already scanned and in several formats freely available on a Society for Creative Anacronism website. I printed those images out on iron-on transfer sheets, ironed them on repurposed house drapes, trimmed them with Pinking shears to prevent raveling, and embroidered over them. I did not want someone else to draw the pictures of the images for me to embroider over, because I wanted to capture as much as I could from the original artists. The patches are around 8 in. x 11 in. and are done in the embroidery technique known as laid work.
My vision was to capture what the artist saw from that period, and put it into another medium that could be hung on a wall. Getting the image out of the book and in a different artistic medium has been an exciting experience for me. Viewing these medieval images in colorful embroidery stitches has enlivened the art work for me.
Many images that are found in medieval manuscripts today can only be experienced by viewing the manuscript itself, or perhaps viewed online via a library or museum which has digitized the manuscript. As a cataloger for many years, I learned that many special collections may have a facsimile of the original manuscript, while other manuscripts are still forgotten, sitting on a shelf un-cataloged waiting to be rediscovered. Some web sites may contain a small fraction of the images from a manuscript, but do not show the entire manuscript. Many collections are yet to be processed or do not have solid metadata included in their records to help make them more discoverable to a searcher.
Most of the images I have embroidered come from Greg Lindahl, who uploaded images from Las Cantigas de Santa Maria and The Book of Games found in calendars, books, or other resources, to the Society for Creative Anacronism website for members learning about medieval dance. However, I found other interesting images of Las Cantigas de Santa Maria from books I have in my own library and after I learned tools in Paint and Word.
One such image of Women Shopping (see below) I found in the book: Daily Life Depicted in the Cantigas de Santa Maria by John E. Keller and Annette Grant Cash.

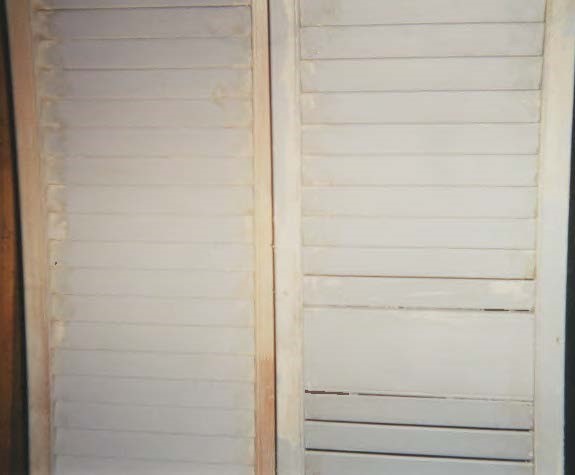
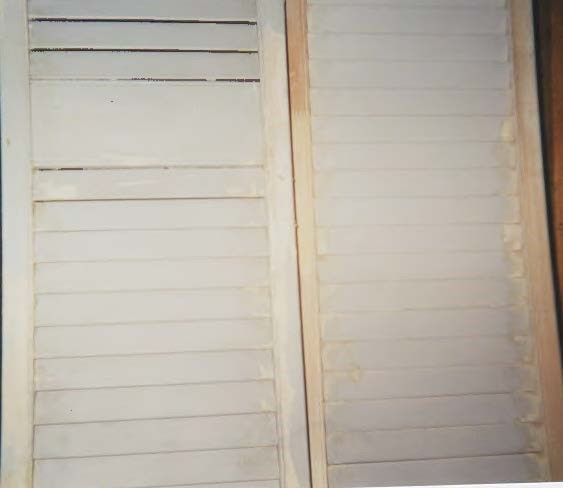
Once I had learned laid work and had realized the potential of bringing the art from medieval artists out of the page, I realized that I did not have the wall spact to frame the many patches I wanted to create and I wanted the overall educational effect to show as many musicians as I could, assembled in some way. My good friend Lynn Shirk suggested a screen. I wasn’t sure what he meant, so I read up on the Medieval screen at the Boulder Public Library. I wasn’t sure how to proceed, and it was Lynn again who suggested that I could use wood interior bi-fold doors. He even suggested I could save some dollars by buying used bi-fold doors at the Boulder Center for Resource Conservation. I brought them home to strip them of paint, stain them, and then paint Ivy leaves and grapes on them.
Painted Panels: The total of the wooden panels is ten, and the last two are nearly twice as wide as the first eight. The first four panels have solid wooden lower halves, so I painted those black. My husband, Marc Wiley, assisted me in linking all ten panels with metal hinges so that the screen folds nicely in accordion fashion.
Recycling or Re-use of Materials
Within the Middle Ages the use of recycling was practiced. The re-use of embroidered patches, applied to tunics was a popular practice. Where did I read this? I don’t remember; perhaps I learned of this practice in the fiber arts guild when I learned the art of laid work. If I come accross documentation about this fact, I will share it on this blog.
As I have shown, the laid work stitch creates a sturdy patch. The medieval embroidered patches using laid work would outlast the cotton or wool tunics. So when it came time to replace the tunic, the patches would be removed, and added to other clothing.
For this fiber art piece, I have recycled many things in order to save money as well as practice the necessary need to recycle.
- Wooden Panels (bi-fold doors)
- Curtain drapes (fabric used to iron-on images and embroider over)
- Containers for pre-measured and pre-cut floss (M & M tubes, medicine bottles, mint tins, gum tins)
- Embroidery floss (used floss found in garage sales, used clothing stores, or on Ebay, are very usable especially if there is no smoke damage).
The wooden panels were purchased at a recycle establishment, rescued from rotting in a landfill. Plastic lasts forever, so why not store pre-cut floss in them? I love the color-coded tubes for sorting out floss by color. I miss the variety of colors that M & M used to offer. Now, we only see about four colors they sell their mini M & Ms in, and occaisionally they will market the vibrant green and red tubes around the Christmas holiday.
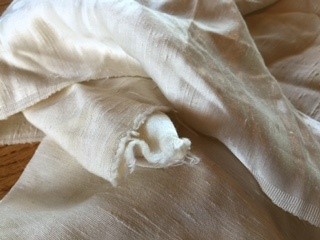
When I began practicing laid work, I found straight cotton or wool fabric difficult to work with. I needed a thick enough material, but not too thick. I needed something with a weave which would be pliable enough to allow for the needle to easily go in and out. I found what has been a good match for me.
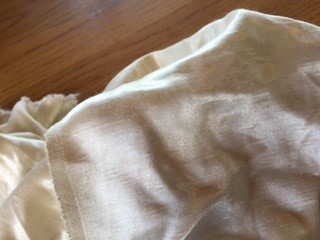
When my dear friends: Carolyn James and Lynn Shirk, were buying their first home, the previous owners were smokers, thus the drapes they inherited could not be cleaned well enough to be used as drapes. They asked if I would have any need of the fabric before they considered giving it to a charity. I took a look at the material and was pleased with it. I took all the drapes, ripped out all hooks and board that was sewn within them. I washed them one more time, and then ironed the material. The material is by no means authentic to the medieval period, however, I am hopeful that the combination of Rayon and Acetate will survive for decades, compared to wool or cotton.
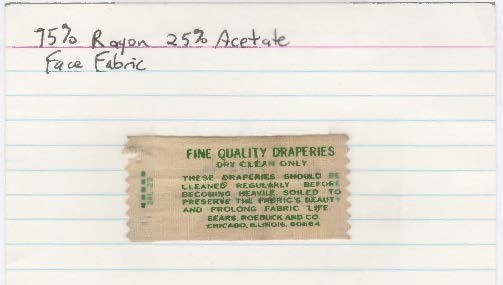
The material was light in color to enable me to iron the transfer images on

Preparing embroidery for travel: As I mentioned, I find that useing M & M, gum, and medicine containers, to sort out the embroidery floss is an excellent way to pack for travel for an embroidery patch. I find it helpful to use the various colored containers of the mini M & Ms to sort the floss by color in shelves at home, much like a paint artist may have paint organized in a studio. The size of the mint tins, candy tubes, and medicine bottles are also easy to pack in a small bag for travel. I pre-split the cotton floss, 3-threads each, and measure a good length, and cut. The 3-strand strings I wound around my index finger and put in the containers. Why? Having containers with the floss I need makes my fiber art easier to travel with and saves time by not having to stop embroidering to cut and split thread while working on a project. Having the pre-split thread, in small containers, is a great method to keeping my embroidery project more portable. Doing this allows me to take my fiber artwork on the road, whether on an airplane, bus, or car.
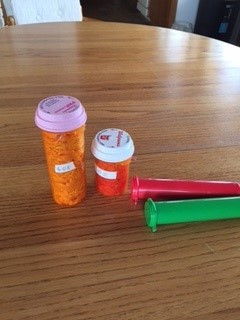
When the mini M & Ms stopped creating the many colors, and limited to only maybe six colors per year, I stopped buying them. I also realized that I had free containers every time we purchased our medication or medication for our pets. This plastic bottles are perfect for storing floss. I put medical tape on the bottle and write the floss number on it, so I know which color I need when it needs replacing. I organize the many containers in stackable shelving as seen below.

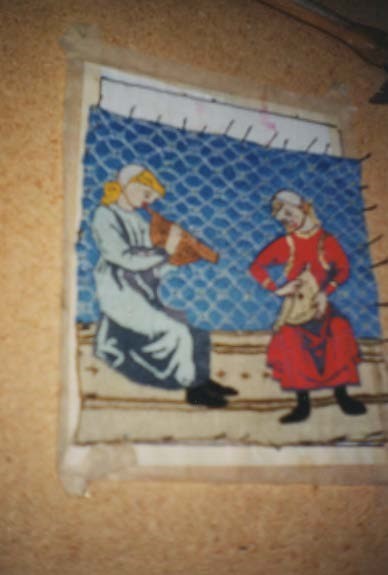
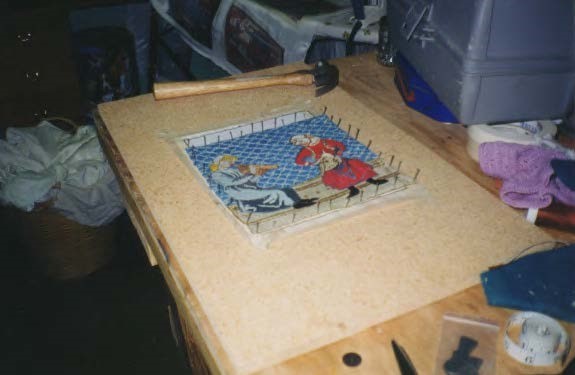
Blocking and Panel Arrangement: Once a patch is filled in with laid work, it must be blocked. This method is all about cleaning the patches. To be honest, all of my patches will most likely contain cat and/or dog hair, as we have pets. No matter how much we vacuum, the hairs float or stick on furniture and invariably get woven into my work. I have accepted this as the historic process of a current embroiderer and believe medieval fibers will show similar evidence of animal hair. I fill a plastic tub with cold water, and about two tablespoons of Woolite, and soak the patch for 10-15 minutes. I then rinse the patch thoroughly in cold water, wrap the patch in a dry towel, and then press or pat as much water as I can out. Now it is time to block, which consists of stretching the patch within a measured 8 ½ in. x 11 in.square traced out on paper, taped to a board. I then nail the patch using thin nails, as I stretch it, to the board. Once it has dried, usually within a day, I take the nails out, massage the holes on the sides, and have a piece ready to hand sew onto the screen.
Before I ever attempted to attach a patch on the panels, I pinned paper print-outs of the images, to get a better sense of how they might look. This was when I got the idea to use Inkle weave as a method to frame the images. My friend E. J. Benstock designed an Inkle pattern for me and helped me get started on the pink and pale blue pattern.